


Red Bull Safety
Today the Red Bull sales reps came to visit. The two of them read us the rules and regulations. It seems Red Bull is very concerned about safety. With all the safety precautions, Brent should be able to survive the fall.
FRIDAY, JULY 18, 2008
Of foam insulation, adhesive, saws and sandpaper (or, how to sculpt with home-building materials)
Late last week we began the official build of the Operation guy (dude? patient?) at Dan's place. The materials were ready to go, although about 2 hours in we found ourselves hopping into the car for the first of several restocking trips to Home Depot ("More Glue!"). Burgess and I are tasked with sculpting the actual form of the guy, and we chose high-density foam for its lightweight and reasonably easy-to-work-with properties.
Zee Plan
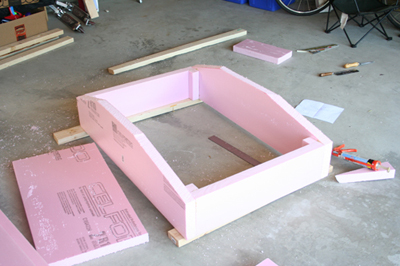
The plan was to cut out basic shapes, matching up with Dan & Curt's pilot sled dimensions, then laminate everything together with adhesive (the headache-inducing kind). After a period of drying & curing, we'd start carving away the foam using a saw, then sand out the final form.
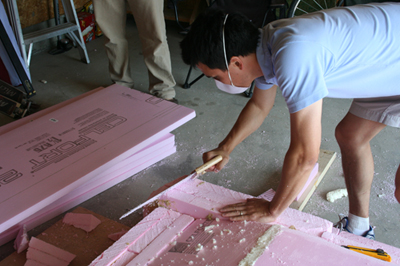
To be honest, it has gone surprisingly well so far (fingers-crossed). We came back on Friday after piecing together the basic torso and arm shapes, and got right into carving out the belly and arms. I handled the sawing/sculpting duties and Burgess came behind me with the sandpaper. The guy is a bit on the buff side at the moment, but I'm pretty sure the paint will fix all of the minor issues that crop up, and when viewed from a distance, it'll look great.
Safety First
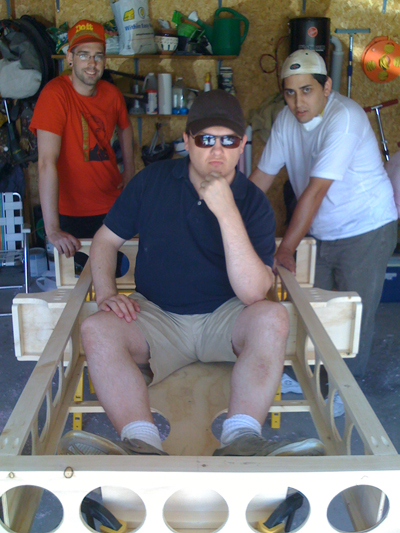
The foam is all that is stopping Brent from going head-first into the water, but it's probably a good thing if he does go through it - it'll be much more forgiving than a wooden frame snapping him in half. The foam body will be fitted directly over the wooden sled that Dan & Curt are building. The sled is what will be bearing all of the weight. Brent will pop up through a hole we'll be cutting in the belly of the guy and should be able to sit comfortably with his arms resting on the top of the belly, about 21 inches up from the base of the sled.
Next Steps
We'll be back at it tomorrow, starting on the head and legs once we finalize how it will be attached to the sled. The plan is to have it ready for paint by the end of this week, so we have enough time leading up to our departure at the end of next week to get all the details right. We're also meeting the local RedBull representative tomorrow, who is coming by to see our progress and review the competition rules, itinerary, etc.
It's starting to feel real.
TUESDAY, JULY 8, 2008
Lesson Learned (Don't use spray paint on foam)
We started playing with the idea of using installation foam to build the mold for our 3D operation guy. We needed to know if it was easy enough to sand and also weather or not it could hold paint.
Dan ran down to Home Depot to find some scrap pieces to test how they would glue together and how well he can sand them. The glue seemed to hold the pieces together and it was easy enough to sand the foam.
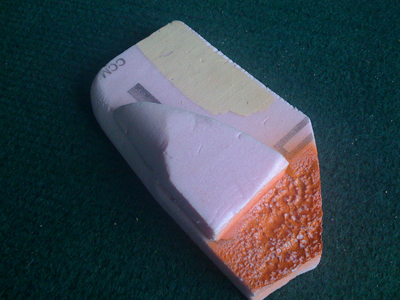
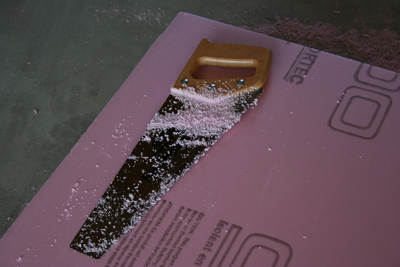
I then had the task of testing different paints on the foam. I feel most comfortable using spray paint, I thought that would work perfect on our foam structure. Luckily I used a scrap piece to test out the different types of paint. I used an orange Montana spray paint as my first test. As you can see in the photo, the spray paint ate right into the foam.
I also put a cream latex acrylic paint in the other corner. The acrylic paint worked and it didn't eat through the foam. We will also add a couple layers of primer before painting the foam guy with the acrylic paint.